Foldr provides the ability to add additional contextual metadata to existing files, no matter where they may be stored. This metadata is available through the use of the Custom Fields feature that the Foldr server administrator must enable for users before it is available for use.
Custom fields are available in a range of data types and are completely configurable in terms of granular permissions and user visibility. It is possible to attach different metadata to the same files based on a users role in the organisation.
The data stored in custom fields can be used in Foldr searches, workflow automations and they may also be populated automatically via the optional Captur module.
Custom Field data types
Custom Fields are available in the following data formats:
String
Text
Number
Boolean
Date
Signature
Creating Custom Fields
Before custom fields can be made available to users on specific shares / storage repositories, they must be created on the server.
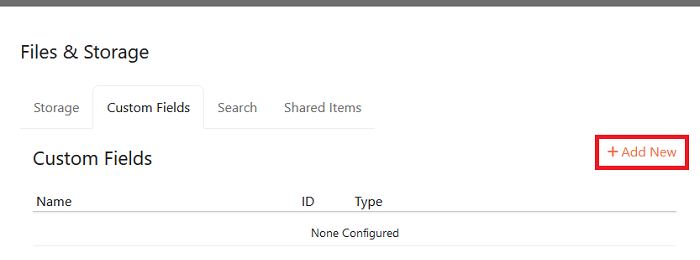
To create a custom field, navigate to Foldr Settings > Files & Storage > Search & Data > Custom Fields and click + Add New
Give the custom field a suitable name and select the appropriate type from the drop down list. If this is going to be a multi-value field (more than one entry per field) then enable the toggle labelled ‘Multi-value’
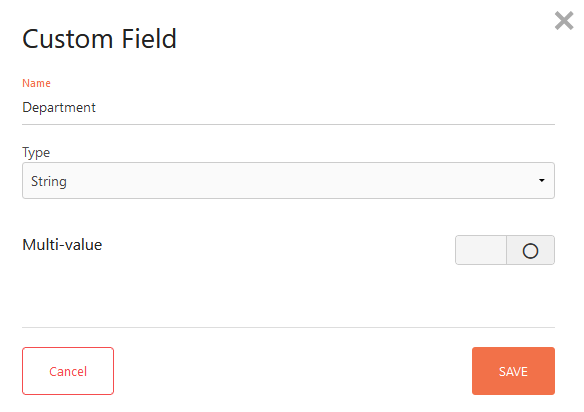
Click Save
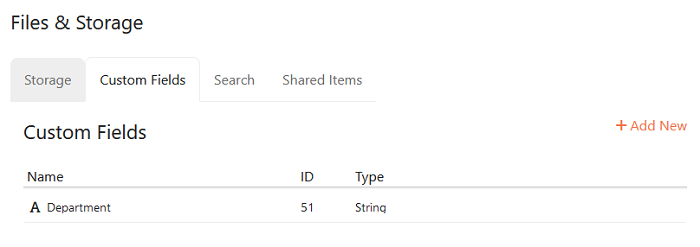
The newly created custom field will displayed on the main Custom Fields tab. Create additional fields as required.
Assigning Custom Fields to storage repositories
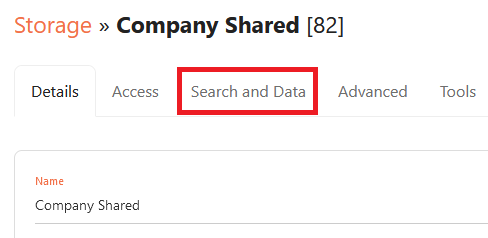
Navigate to Foldr Settings > Files & Storage and edit the storage item. Then click the Search & Data tab
Then select the Custom Fields tab

Drag the required custom fields from the Available column across to the left and into the Configured column. These may be ordered as required and this order will be presented to users accordingly.
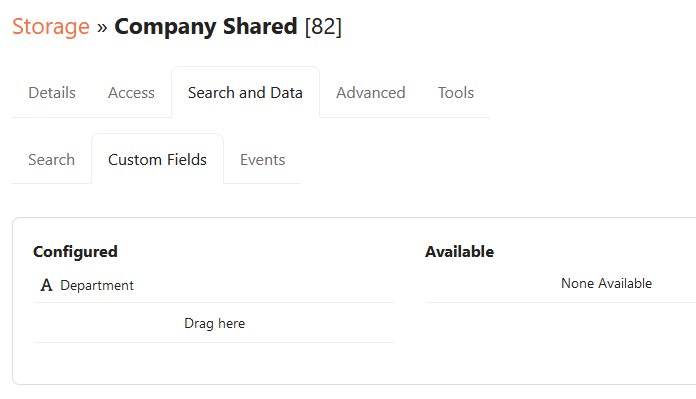
Repeat as required, dragging the appropriate custom fields for this storage item.
Configuring Custom Field Permissions
By default custom fields will be assigned a general permission of ‘Foldr Users’ (everyone) with only show permission allowed. As a result, the field will be visible to users but they will be unable to write/modify it.
Adjust the permissions for a custom field by double-clicking on it while under the ‘Configured’ column, or use the in-line eye button.
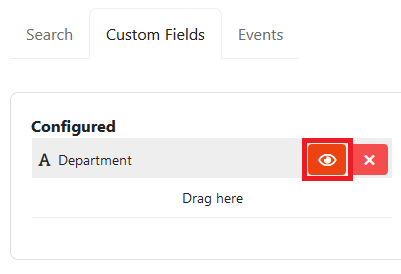
Note the default permissions

Should you wish to allow all users to enter data into the custom field, simply edit the ‘Foldr Users’ group and assign Write with an allowed rule. Should users need to edit an existing field once information has been entered and saved into that field, also assign Edit with allowed.
The Append permission applies only to multi-value fields, where an administrator may wish to grant the ability for a user to add additional field values, without granting the permissions to edit existing ones.
Configure the permissions as required, and then click Update
Example permissions
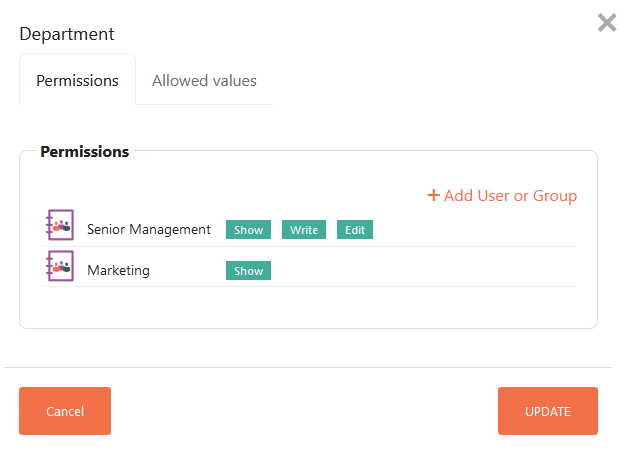
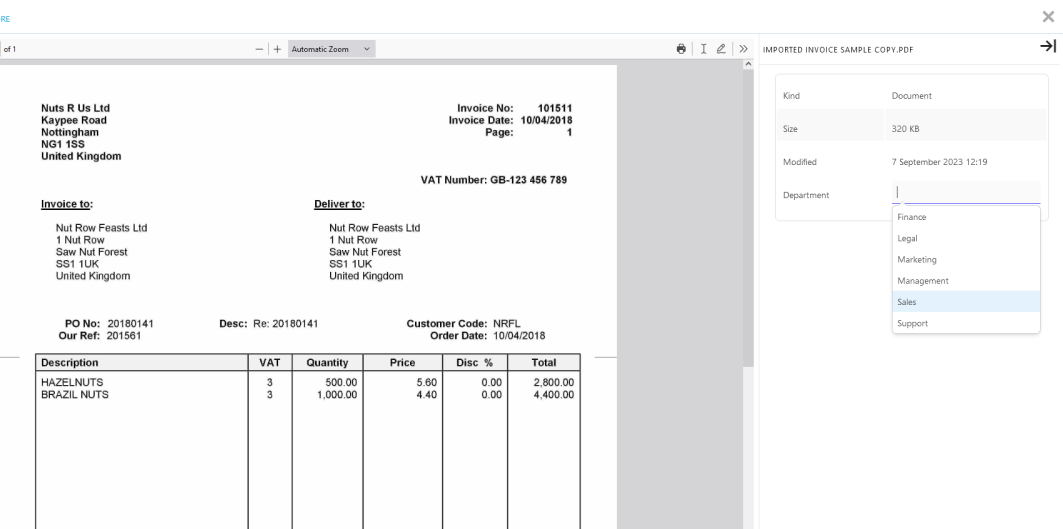
Where the custom field type is STRING it is possible to configure a list of allowed values using the Allowed Values tab in the screen above. Where no allowed values are configured, the user will be able to enter any value. Example below:
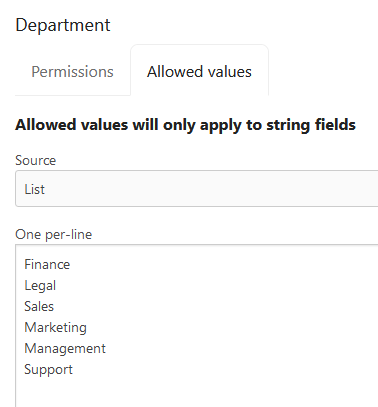
When users now sign into Foldr the custom field will be availble to them with the permissions that have been configured by the administrator. Note the allowed values on the right show as a drop-down in the Department custom field.
Searching against Custom Fields
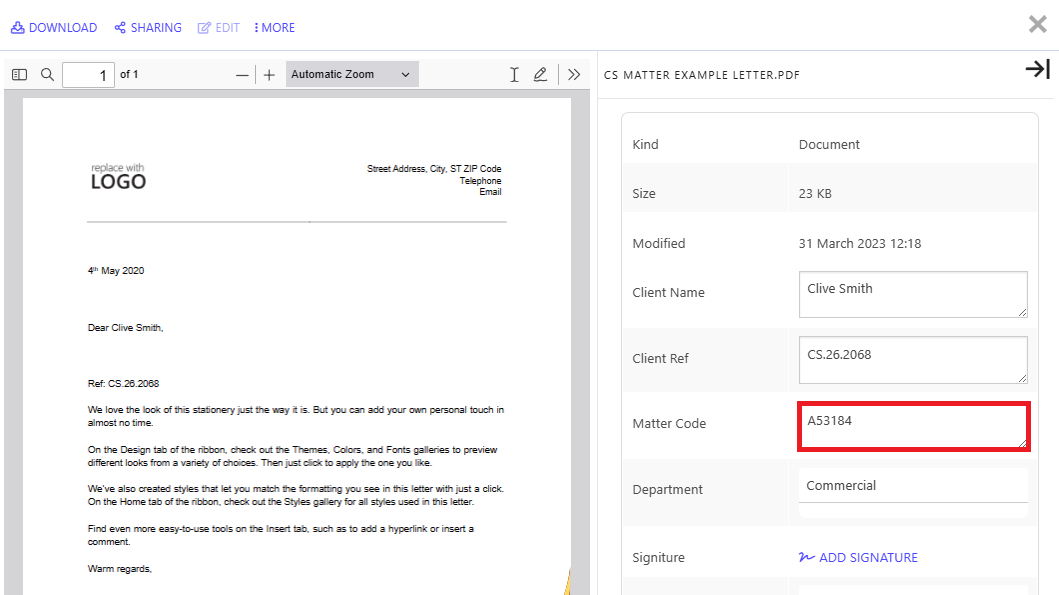
In the example below, various custom fields have been configured and assigned to a storage item in Foldr Settings > Files & Storage. Note the ‘Matter code’ field and this data is unrelated to the information in the document itself.
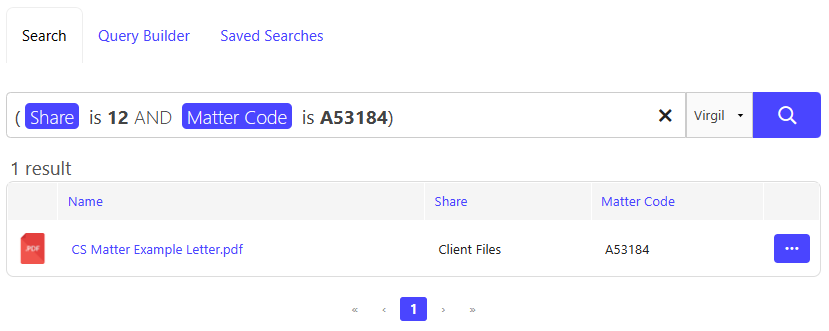
Using the Foldr Query Builder, a user can search against the common types such as file name, share / path and so on but also include custom fields. In the example below, the user wishes to search and find any documents on this storage with a Matter code of A53184.

Populating the Query Builder with the required information, clicking the search tab and then the search button will locate the document.
Additional – Configuring Date Precision
When enabling Date type custom fields on shares / storage locations, the administrator can configure the precision by that the date field must meet. The available options are:
Minute
Hour
Day
Month
Year
The user using the custom field can then drill down to the configured precision value set by the admin. Example below using the picker with minute precision configured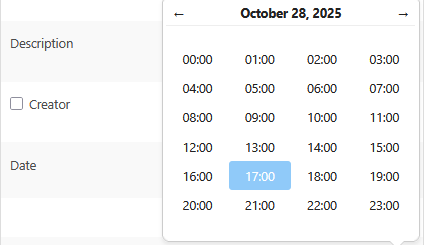
Example field after using the picker with ‘Month’ precision:
![]()
Configuring Date Precision
To configure date precision on a custom field, browse to
Files & Storage > Edit-Storage > Custom Fields > Edit-Field > Validation tab
Select the required value from the Precision drop-down menu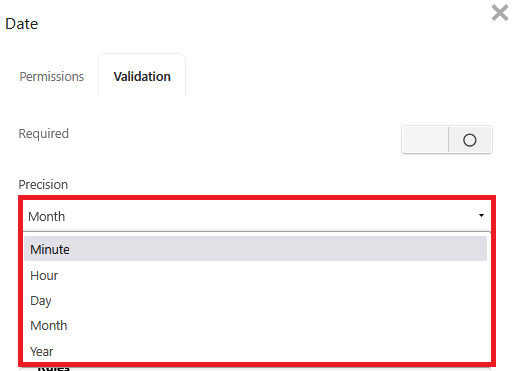
Click the Update button to confirm your selection.
Enforcing a Min / Max Date Range
Should you need to enforce a date range that users can select when entering dates into the field, select:
Files & Storage > Edit-Storage > Custom Fields > Edit-Field > Validation tab > Patten > Custom
Then set the minimum and maximum dates as required.
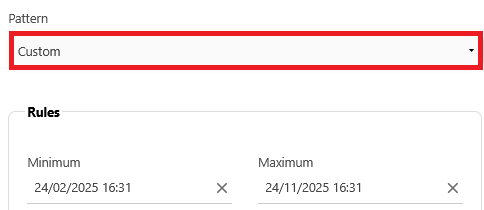
Confirm your changes by clicking the Update button.
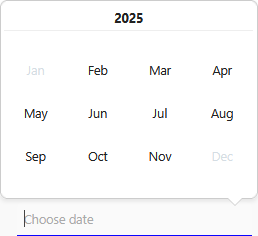
Users interacting with the custom field will then only be able to select between the configured date range in the picker (note January & December greyed out)
Additional – Setting fields as Required
Custom fields can be set as ‘Required’ and any configured as such will be highlighted in red to users when viewing and editing fields. Only when required fields have been populated with data will users be able to save their changes to any other fields enabled on that share.

To configure custom fields as required, browse to and enable the Required in:
Files & Storage > Edit-Storage > Custom Fields > edit field > Validation tab

Confirm your changes by clicking the Update button.
