The Foldr server provides built-in support for Cloudflare Tunnel to provide a fast simple setup process to gain secure access to Foldr outside of the organisation without having to make adjustments to corporate firewalls / routers (1:1 NAT mapping or port forwarding)
Cloudflare Tunnel works by allowing a server, such as Foldr, to create a secure outbound tunnel to the Cloudflare network and this is then handled by Cloudflare’s internal systems and DNS infrastructure to provide access via an public hostname of your choosing. The creation of the outbound tunnel is performed by a locally installed daemon (called cloudflared) and this is installed on the Foldr server after applying server update v.5.5.0.1. The cloudflared daemon will be updated to later releases as and when they are released by CloudFlare and included in the main Foldr server updates.
It is preferred if the organisations DNS is managed by Cloudflare as tunnel creations and management of DNS entries occurs automatically, however this is not mandatory and Cloudflare Tunnel can be used by organistaions whose DNS is managed by another provider. This is referred to as a partial DNS setup, rather than ‘full setup’.
Using Cloudflare Tunnel also has the benefit of automatically providing a trusted SSL certificate when users connect the external / public URI of Foldr. The Foldr server can run an untrusted / self-signed SSL certificate interally, and users will have their connections secured by an automatic Cloudflare SSL managed Let’s Encrypt certificate.
More information on Cloudflare Tunnel its associated documentation can be found here
Limitations
Cloudflare Tunnels are available to both free and paid for organisation Cloudflare accounts. Please note that the main ‘free’ tier limitation of using Cloudflare and Foldr is the 100MB file size upload limit.
Let’s Encrypt certificates installed directly on Foldr server itself (Under Foldr Settings > Security > Certificates) can not be used with Cloudflare Tunnel, as Cloudflare redirect all HTTP traffic on port 80 and as such Let’s Encrypts domain validataion process fails. Cloudflare will manage the Foldr server’s public HTTPS hostname URL and install, manage/renew these automatically without any additional configuration.
Setup
Sign into the Cloudflare Zero Trust dashboard at https://one.dash.cloudflare.com/
You can also launch Zero Trust from the main Cloudflare dashboard, using the Zero Trust link in the left hand panel

If this is the first time your administrative account has accessed the Zero Trust dashboard, Cloudflare will prompt you to create a unique team name as shown below. Choose a suitable Team name for your organisation and click Next.

You will then be prompted to choose a plan. Select the free tier on the far left of the UI, note the ’50 user’ limit isn’t related to Foldr Users but instead Cloudflare registered users that can have policies applied to and managed etc. If a different tier is required by the organisation, then that can be selected.

Confirm the selection in the next summary screen and select ‘Proceed to payment‘

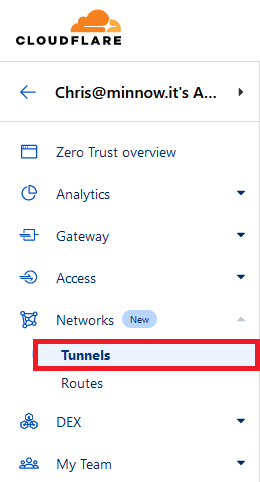
In the Zero Trust dashboard, Select Networks > Tunnels
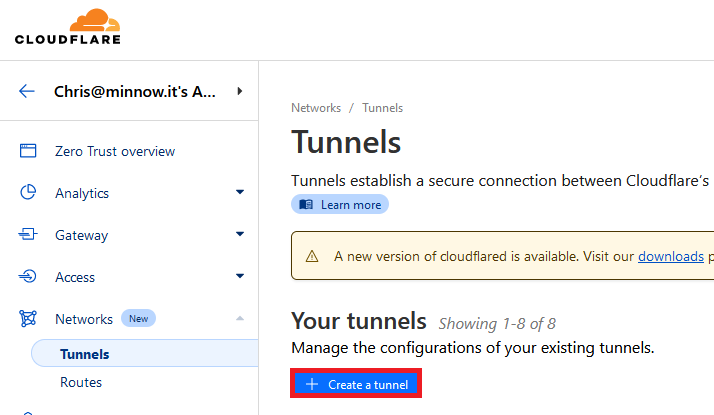
In the Tunnels screen, click the + Create a tunnel button
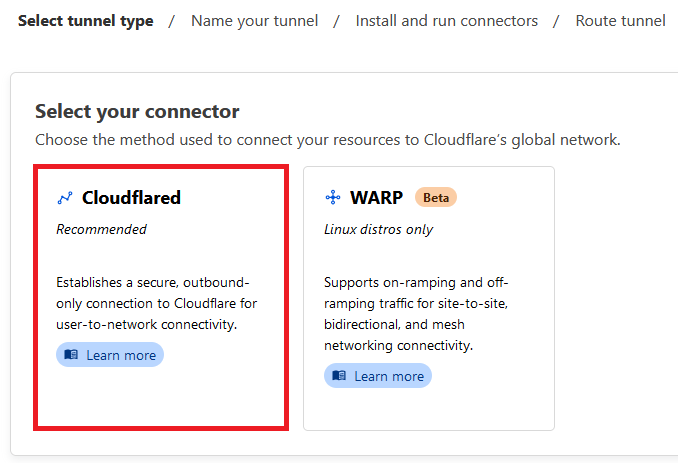
Select Cloudflare and click Next
Give the Tunnel a suitable name and click Save tunnel

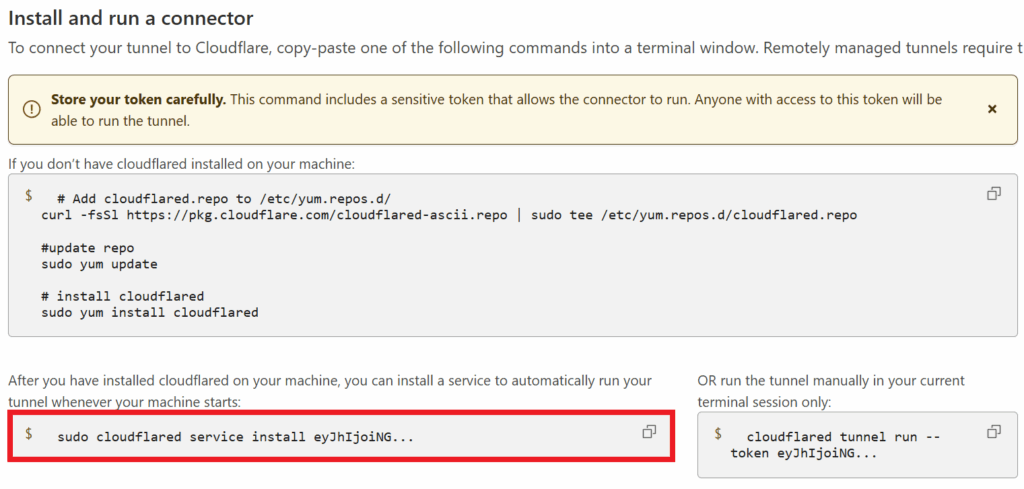
In the Install connector tab, select the Red Hat button

Scroll down and copy the command in the right hand panel labelled ‘If you already have cloudflared installed on your machine’
In a new browser tab, navigate to Foldr Settings > Appliance > Network > Tunnel, enable the integration toggle and paste the command into the Token box

Click Save Changes

Once Save Changes has been clicked, back in the Cloudflare Tunnel configuration page the connector should appear for Foldr with status as ‘Connected’ with the other relevant information at the bottom of the page.

Click Next
The Public Hostnames configuration screen will be displayed. Here you need to select the appropriate URL subdomain and domain to be used by users to access Foldr. In the example below Foldr will be made available at https://myfiles.foldr.cloud
Select the subdomain (myfiles in this example) and domain (foldr.cloud) – the optional Path should be left blank.
Select the Service Type as HTTPS
Select the URL as localhost (as cloudflared is installed locally on the Foldr server)

Under the Service Type and URL fields, click Additional application settings > TLS and enable the following options
No TLS Verify
HTTP2 connection

Note – if a trusted signed certificate is already installed on the Foldr server, it is not required to select No TLS verify. Let’s Encrypt SSL certificates are not suitable for use on Foldr when it is placed behind Cloudflare, as the renewal process will fail due to Cloudflares catch all port 80 / HTTP redirect. Only a paid-for SSL certificates from a traiditional certificate authority such as GoDaddy, Verisign, Sectigo etc can be used.
Click Save tunnel

In the Cloudflare Tunnels summary screen (on the Zero Trust dashboard), the newly configured tunnel should be displayed with Healthy status shown in green as below

The Foldr server should now be accessible externally on the Intenet via the tunnel using the configured public hostname for your tunnel. In this example myfiles.foldr.cloud was used.
Note the connection is secured by a Cloudflare managed SSL/TLS certificate

Presenting Foldr Settings (Foldr v4-v9) via Cloudflare Tunnel
Note this section applies to presenting legacy Foldr servers running up to Foldr v9.x as Foldr Settings runs on a custom port of 30537.
While it is not generally recommended to expose Foldr Settings (web admin UI) to the Internet, should you wish to access it this way a new public hostname needs to be created, using a unique subdomain, pointed at HTTPS (service type) localhost:30537 (note :30537)
In Tunnels click the Public Hostname tab and then select the + Add a public hostname button
Configure the public hostname as follows (example)

Click Save hostname

The addtional hostname will then be displayed in the tunnel summary and Foldr Settings should be accessible via the public hostname configured.
