Foldr allows you to share individual files or entire folders with people outside the organisation quickly and easily as a public link. Public links are also useful for sharing files that are either too large or sensitive in nature to send via email, which is considered an insecure method of transferring files.
Public links by default will be created using a randomly generated string of characters at the end of your Foldr URL (web address), however, they may be given user-friendly/custom names, if preferred.
Public links can be either be accessible to anyone with the link or password protected with a password of your choice. You can also restrict public access to the public links by specifying the recipient by their email address. These are referred to as ‘External users’ and may optionally allow external users to upload files to a shared folder through a public link.
This article assumes the Foldr administrator for the organisation has enabled sharing using public links in the server administrative interface. If you cannot see the public link/sharing tools in the Foldr web app, please contact your administrator.
Creating a public link to a single file
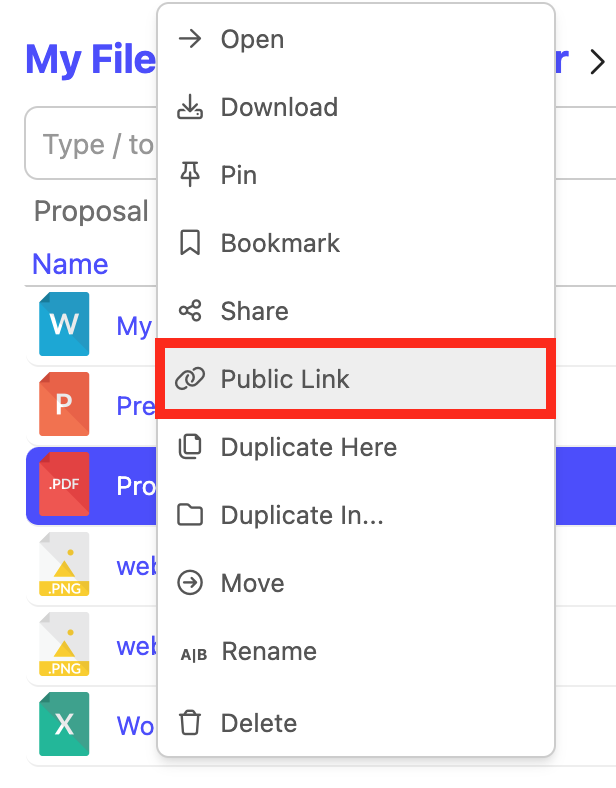
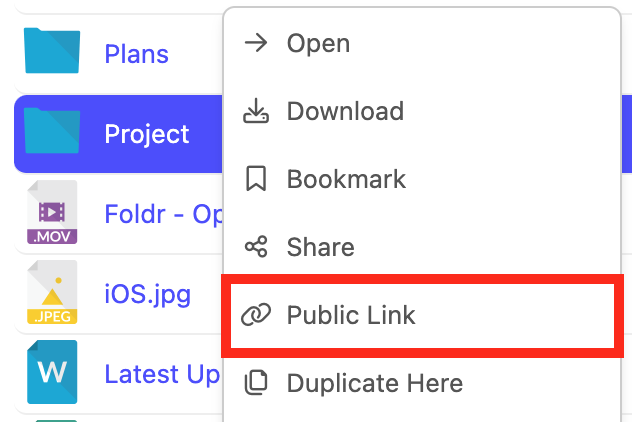
1. In the Foldr web app My Files area, browse to the file that you wish to share publicly and right-click.
2. From the pop-up context menu, select Public Link
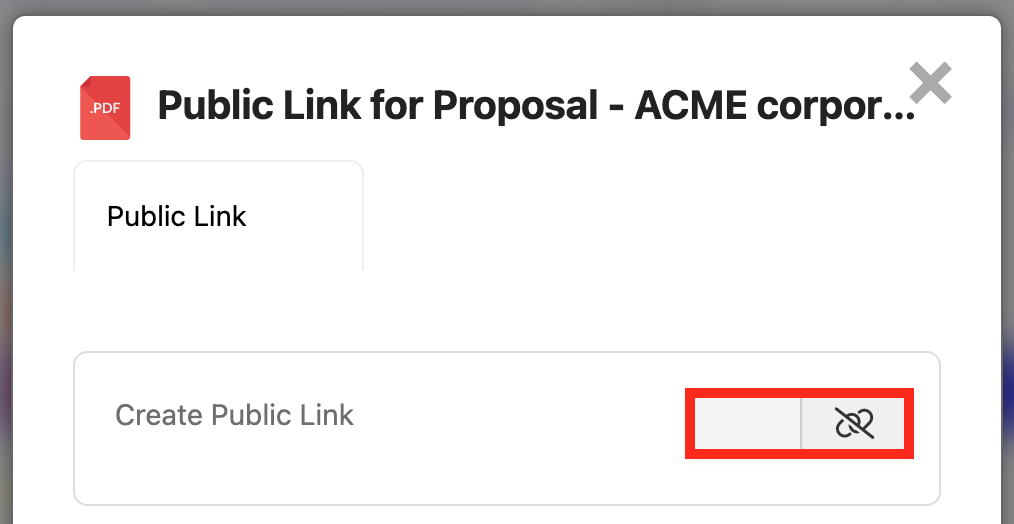
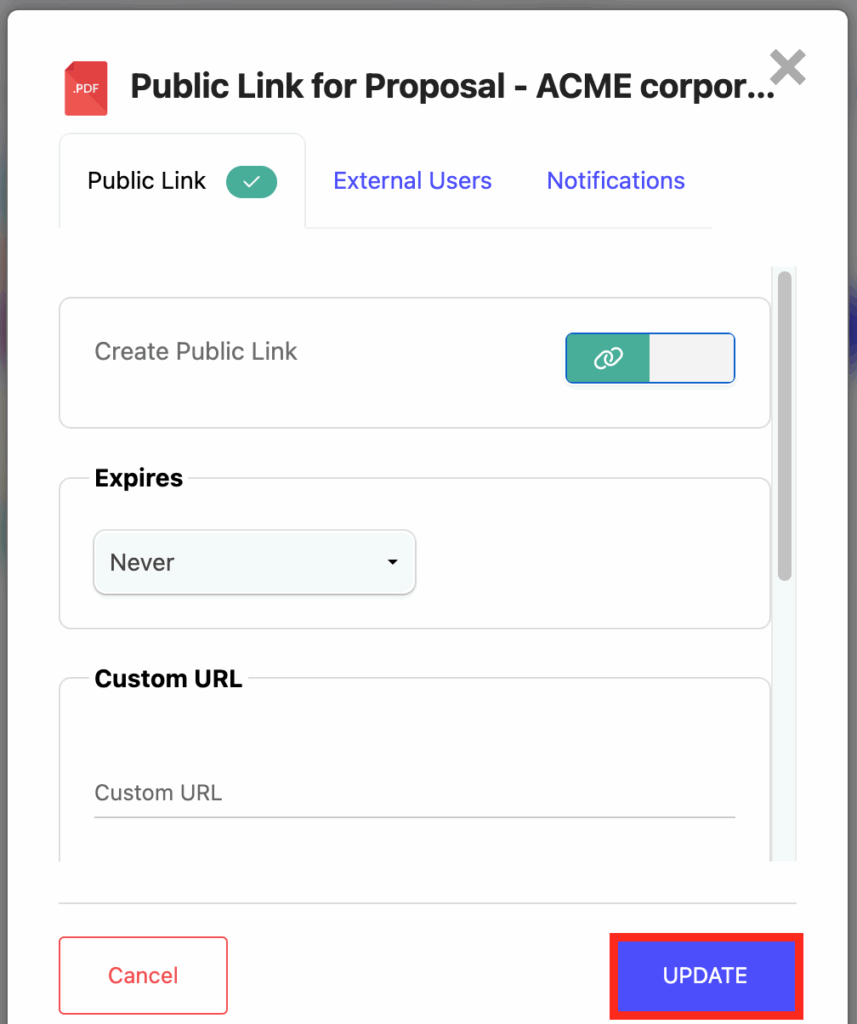
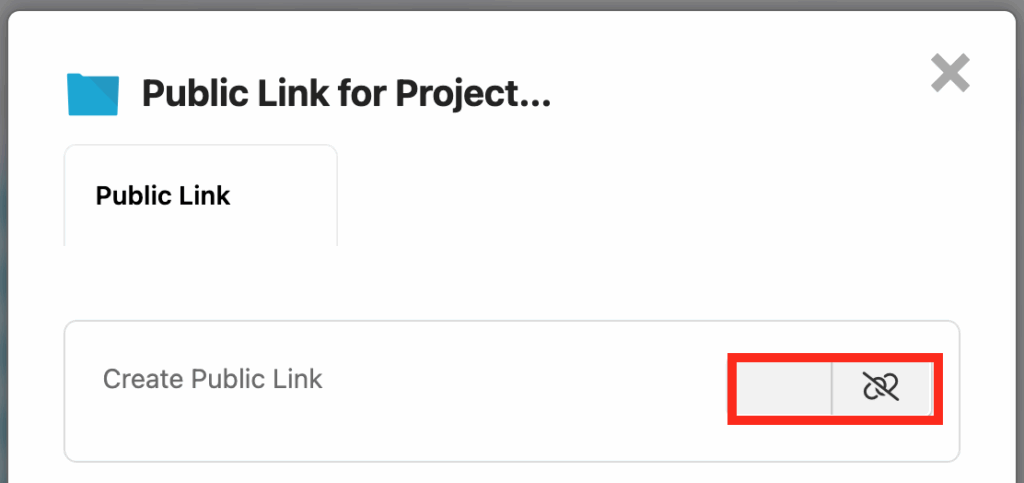
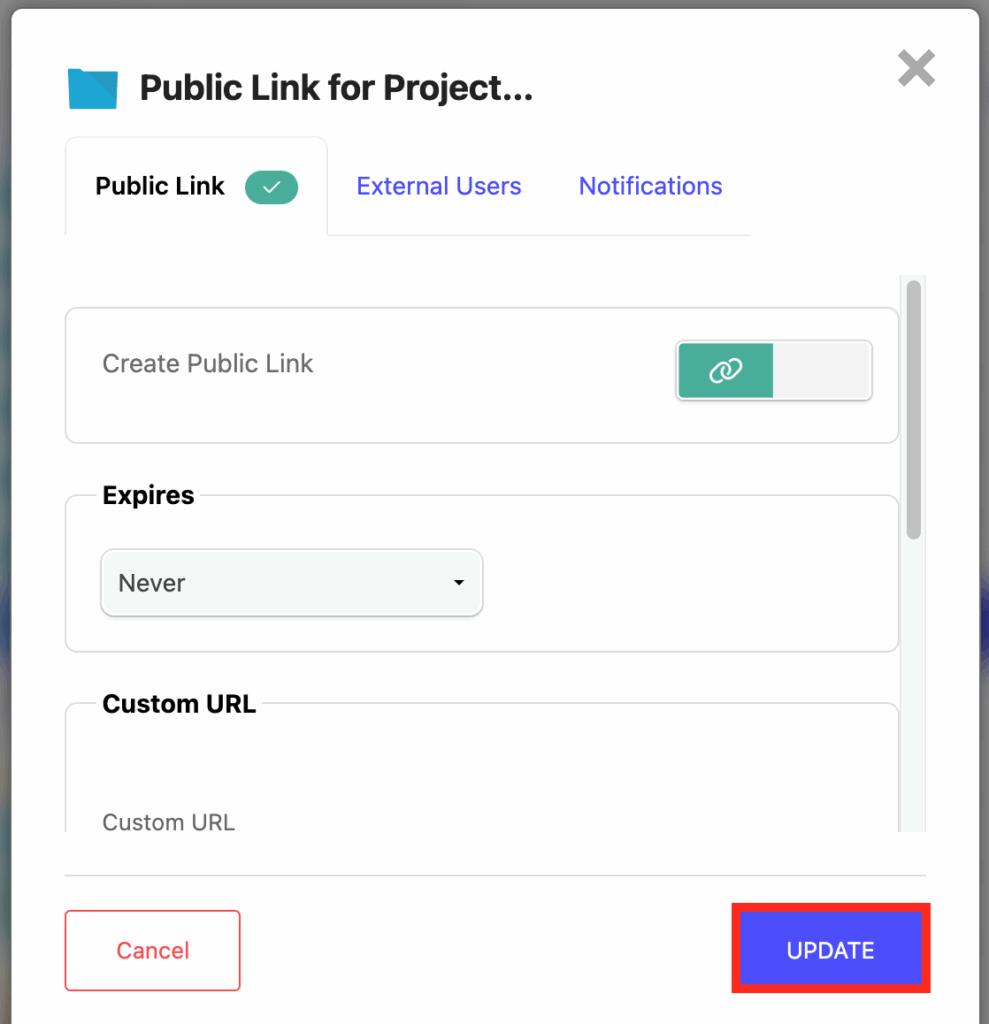
3. The Public Link sharing dialog will appear. Enable the toggle to create a public link.
4. New options will become available (explained later in this article) – Click the UPDATE button and the link will be created and displayed
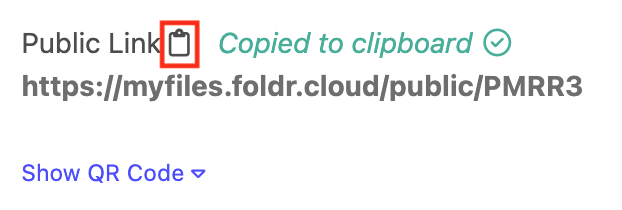
6. The public link URL is shown
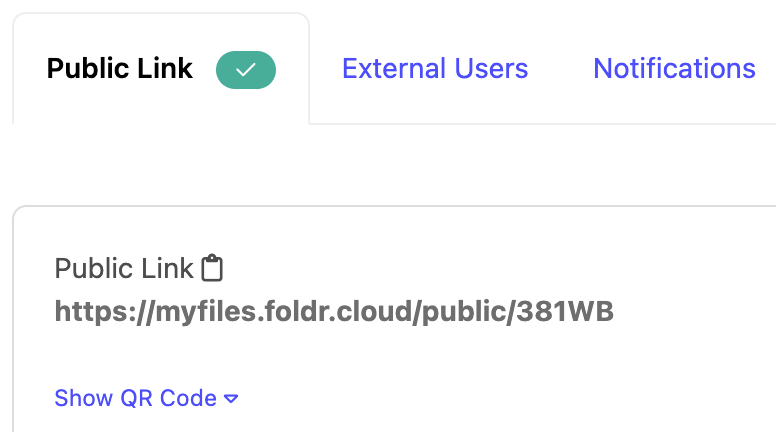
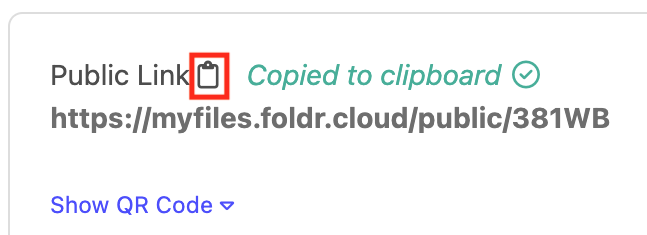
7. You can easily copy the public link address to your clipboard by clicking the clipboard icon, or highlight the URL and copy the text
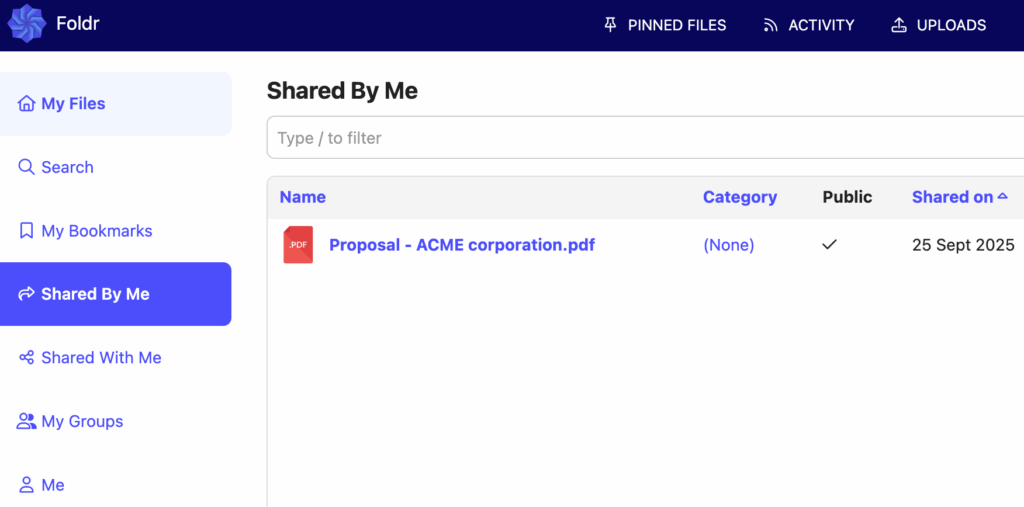
A shared badge is now visible on the document in the Foldr interface to indicate that the file has been shared
The item will also be visible within your Shared by Me area in the Foldr web app (left menu/pane)
8. The PDF document is now directly accessible by browsing to the public link URL, as shown below.
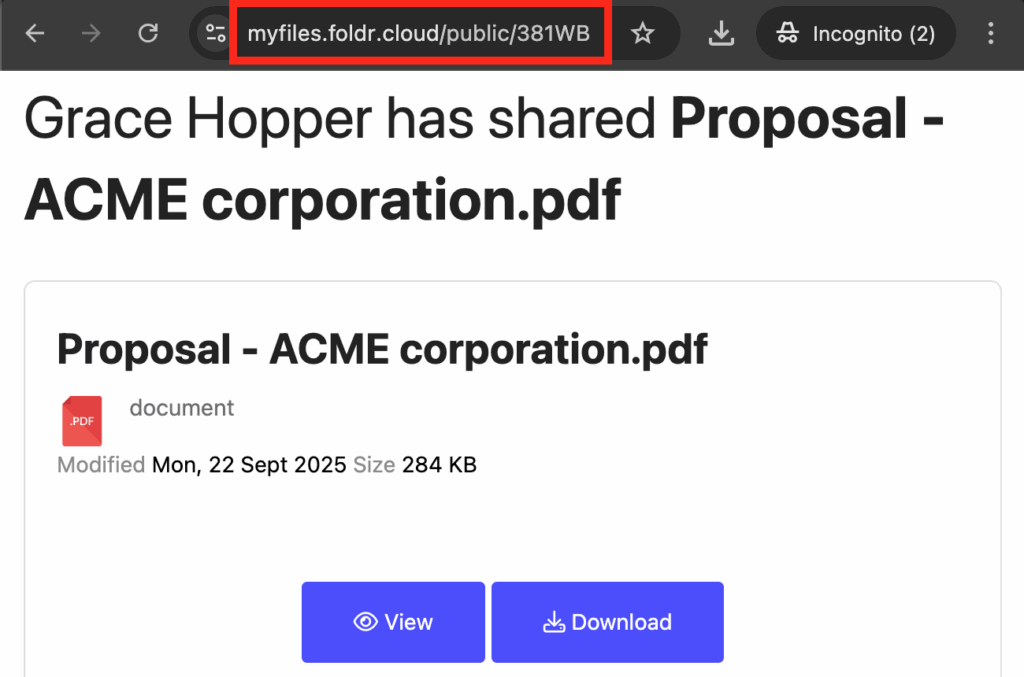
While using a public link, common image files and PDF documents may be previewed directly in the web browser using the View button. Files can be downloaded to the local device using the Download button.
Creating a public link to a folder
The steps involved to create a public link for a folder are the same as an individual file, as shown above.
1. In the Foldr web app > My Files area, browse to the folder that you wish to share publicly and right-click.
2. From the pop-up context menu, select Public Link.
Note – You may also click on the folder and then click the Share button that is available top right while inside the folder that is being shared. Then select the Public Link tab in the pop-up sharing dialog.

3. The Public Link sharing dialog will appear. Create a public link for the folder by clicking the toggle shown below.
5. Click the UPDATE button to create the public link
6. The public link URL is shown
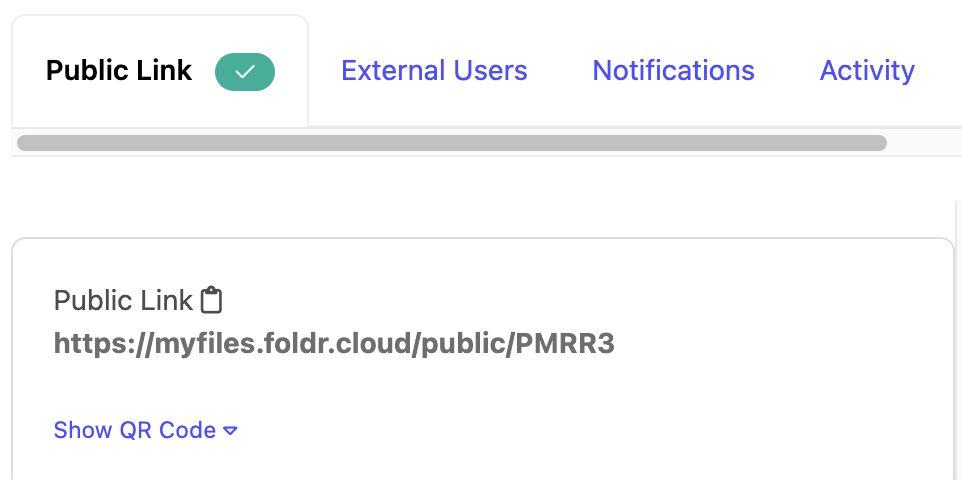
7. You can easily copy the public link address to your clipboard by clicking the clipboard icon, or highlight the URL and copy the text as usual.
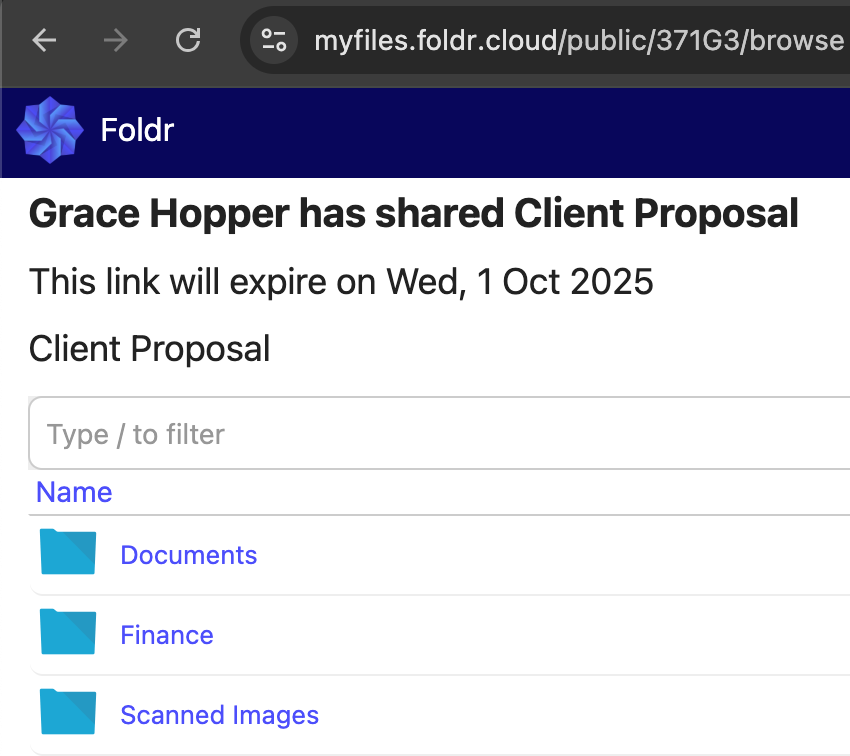
8. The Projects folder is now accessible by browsing to the public link URL, as shown below. Note that /browse is appended automatically.
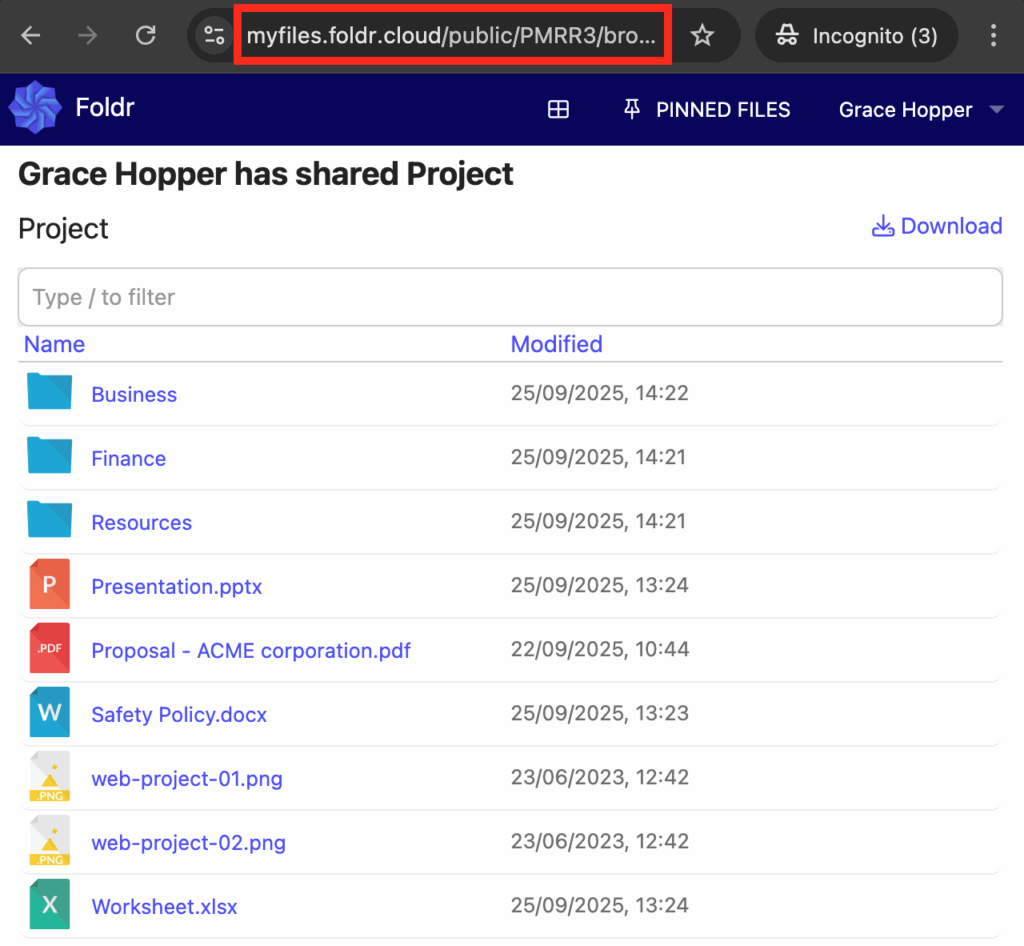
If the folder contains any subfolders (such as business, finance, and policies in the example above) – these are fully browsable and the user can click on the subfolders to browse inside.
All files (and any subfolders if they exist) inside the shared folder can be downloaded as a single compressed .zip file using the Download button (on the right)
Individual documents inside a shared folder may be viewed (depending on file type) and downloaded by clicking on the file of interest
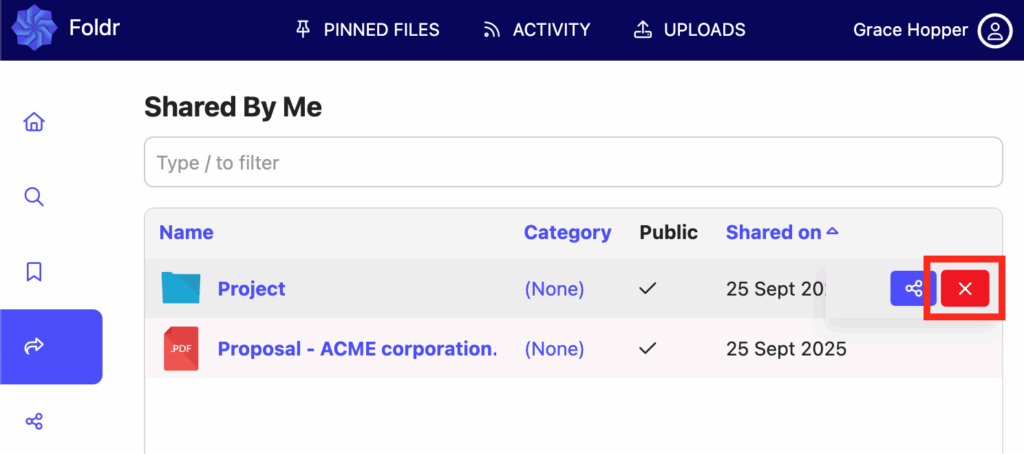
Unsharing an item/Removing a public link
To unshare a file or folder’s public link and remove access, turn off the Create Public Link toggle and click UPDATE in the Public Link sharing dialog, or alternatively use the inline X button in the Shared By Me interface.
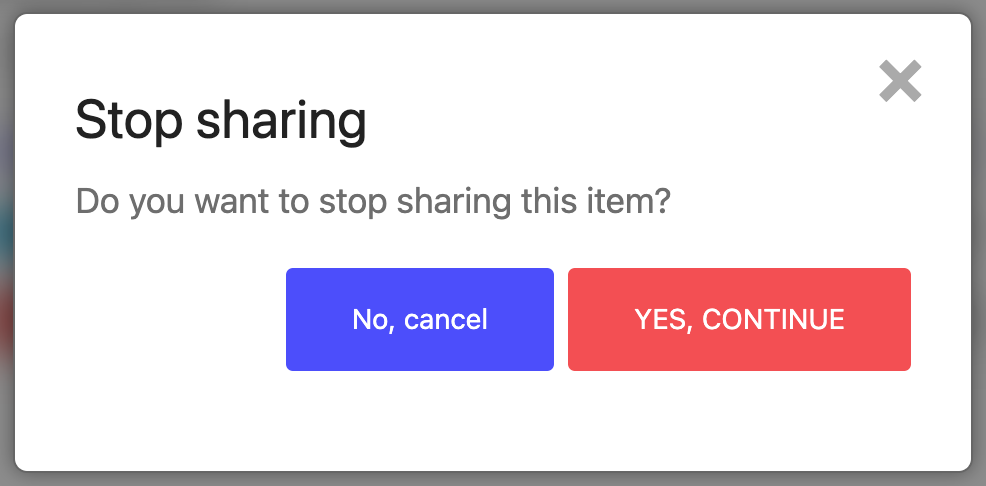
Click Yes, Continue to stop sharing the item.
Public Link Expiry
Public links created in Foldr can be given an expiry date. Once the expiry date is passed, the shared files/folder will no longer be accessible using that public link. Public links may also be configured to expire immediately after the recipient has downloaded the file(s) being shared.
To use the expiry option, click the drop-down menu in the Public Link sharing dialog.
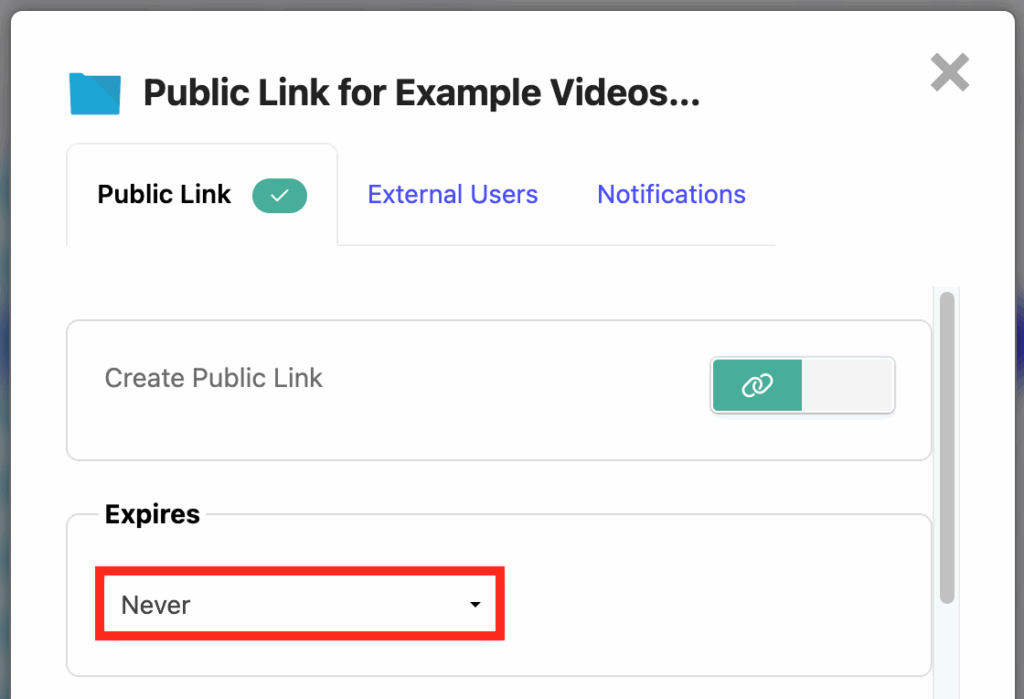
Either select On download in the menu to make the public link a one-time use link or select On date as required.

Click UPDATE to confirm.
Note – When a public link is set to expire, it will be shown to the user using the link at the top of the screen.
Custom URLs
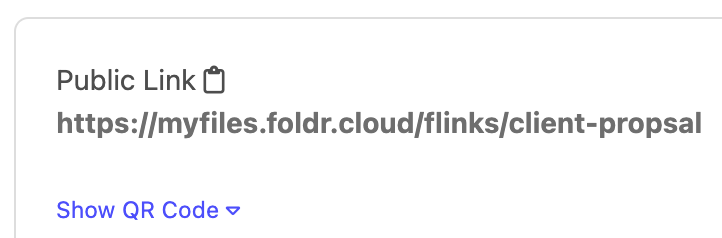
To create public links with user-friendly names, instead of using randomly generated characters, enter a Custom URL in the Public Link dialog. Custom URLs can be set at the time the public link is created, or later by editing the shared item. Note that space characters in the Custom URL are automatically replaced with hyphens.
Example public link using a Custom URL:

Adding a Description
A description may be added to a public link and this will be presented to users accessing the public link, directly above the files/folders being shared.
To add a description, scroll down in the Public Link dialog and Description drop-down menu. As a files or folder can be both shared internally and shared by a public link, both options are available to select.
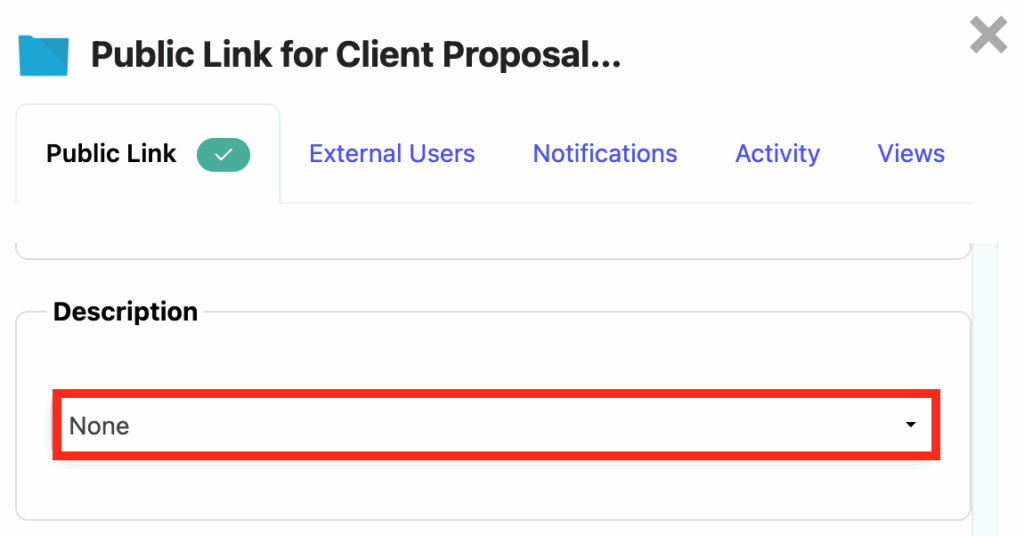
Click the drop-down menu and select Use Public Description. Enter the description you wish users to see when they visit the link in the description field.
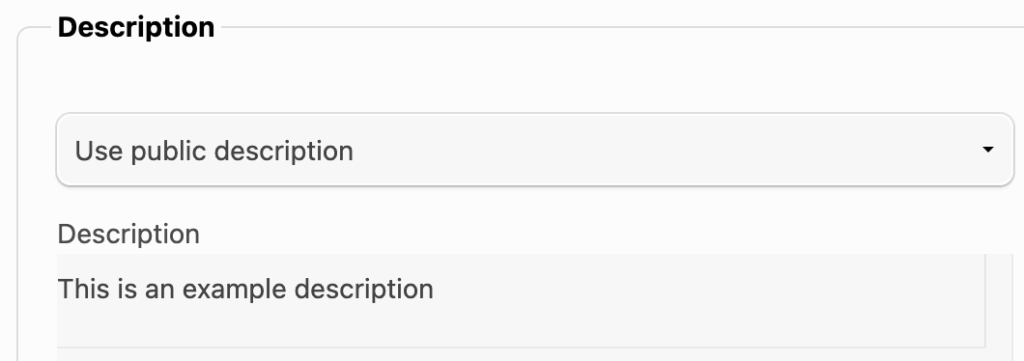
Click Update
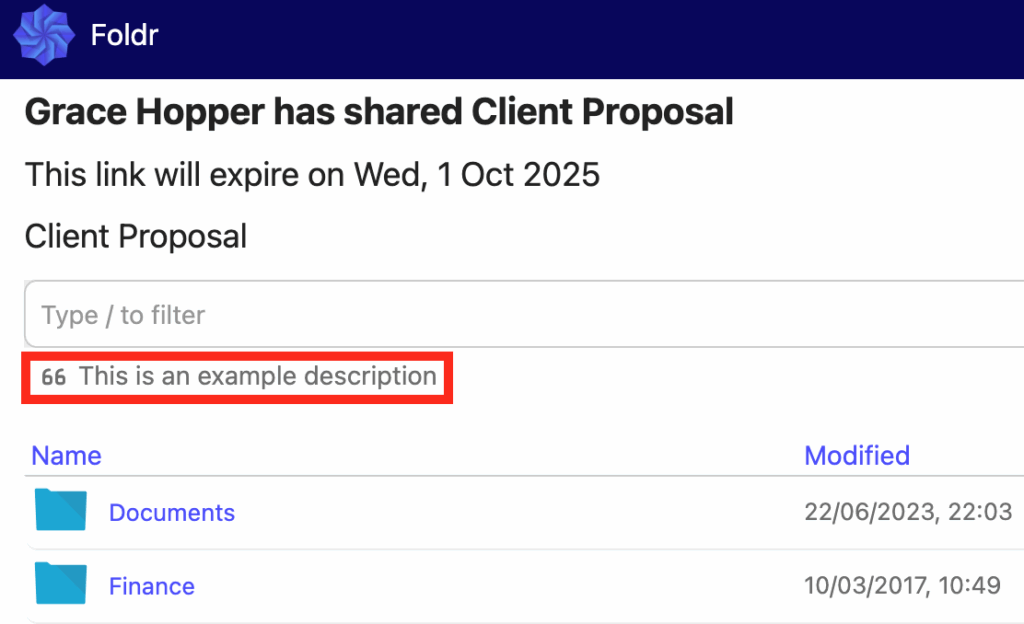
The description will be shown immediately when users visit the public link. Example below.
Restricting Access to Public Links
You can restrict access to public links by setting either a fixed password of your choosing or by providing the email address of the third-party that you wish to share the item (this is a known as a Secure Link)
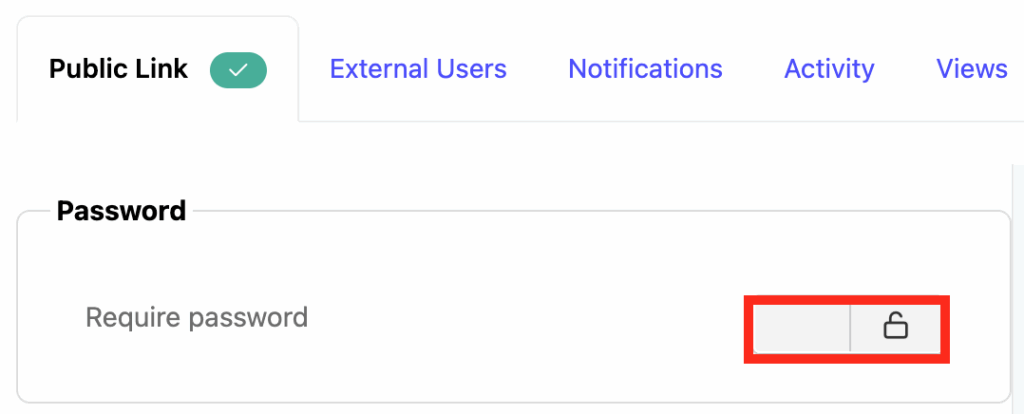
Fixed Passwords
To use a fixed password of your choice, scroll down in the Public Link sharing dialog to the Password section and enable the Require password toggle.
Set the password as required and click UPDATE.
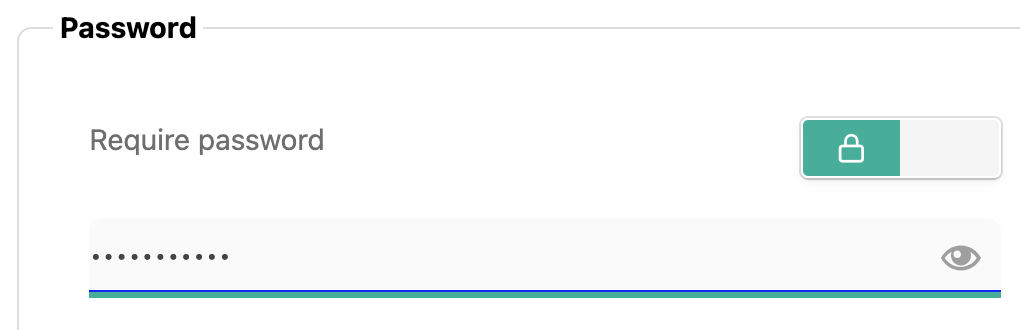
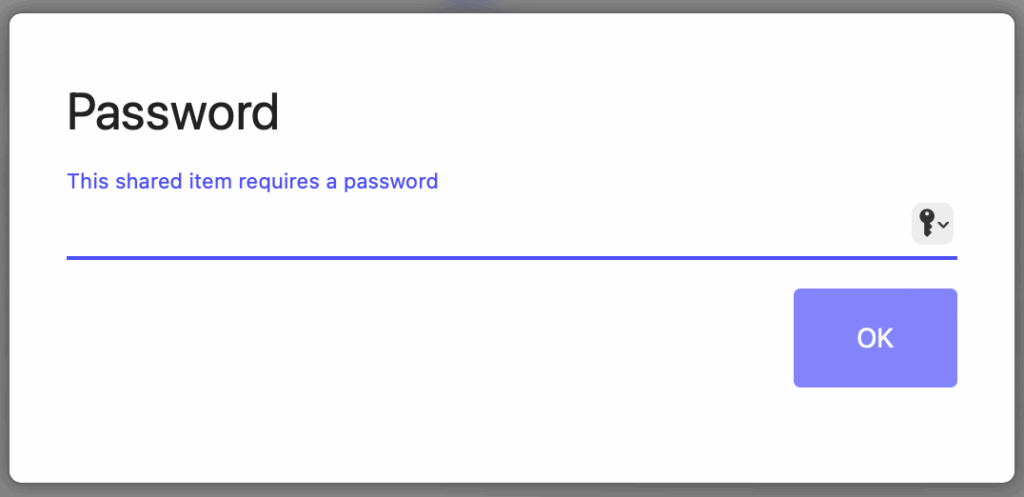
When a user now browses to the public link URL, they will be required to enter the correct password to access the files/folders being shared.
External Users (specifying the email address of recipients)
When restricting access to public links, specifying recipients by their email address is a more secure option when compared to fixed passwords.
Note that the ‘External Users’ tab in the public link dialog refers to users outside of the organisation. Should you wish to share with others inside your organisation, the Share context menu item should be used instead.
When specifying external users, the recipient will receive an email notification that an item has been shared with them. Should you grant the external user the ability to upload files to the shared folder, you will also receive an email notifciation as files are uploaded. Notifications can be controlled/disabled if required in the Notifications tab in Public Links dialog.
An example of creating a public link using the External Users can be found in this dedicated KB article
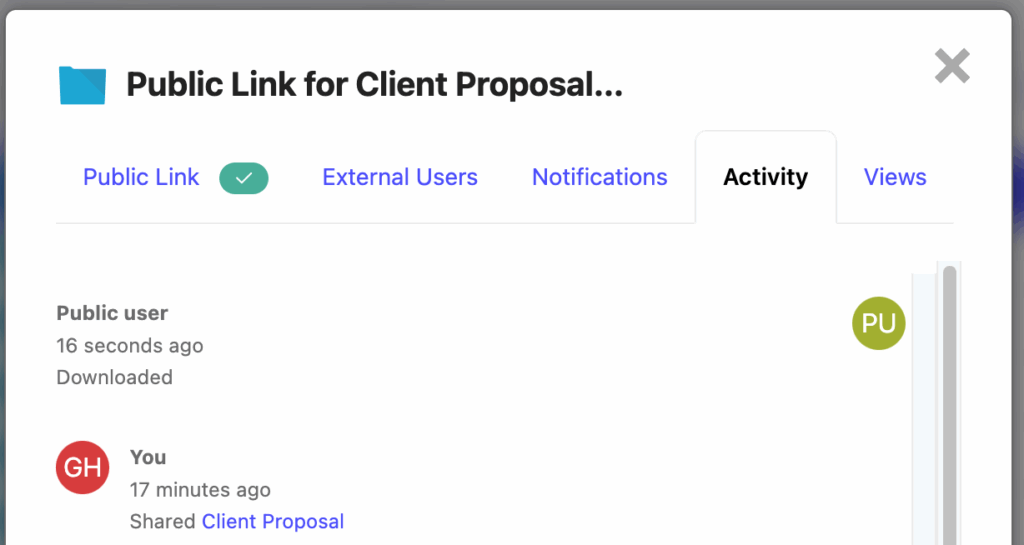
Monitoring the Activity of a Public Link
The activity on a public link can be viewed in the Activity tab in the Public Link sharing dialog and the number of times the link has been viewed is accessible within the Views tab.