Foldr server release 4.24.0.32 introduces support for native Microsoft Azure AD / Entra ID authentication. Earlier versions of the Foldr server appliance supported traditional self-hosted/on-premise Active Directory and authentication via Microsoft Entra ID was only possible by enabling the Single Sign-On feature and using Microsoft Entra ID as the IdP.
By using Entra ID authentication, users can either be redirected to Microsoft Online immediately to sign in, or enter their Microsoft 365 username into the Foldr sign in screen, after which they will then be redirected to Microsoft Online to enter their password and the Foldr app will sign in. The latter option allows organisations to use both Entra ID users and local Foldr users to use the Foldr server.
The Foldr for Windows app release 3.1.0 (September 2024) supports automatic sign in after supplying the username, if the Windows device Edge browser is already signed into Microsoft 365.
When signing in with Entra ID authentication, the user receives a Microsoft 365 authentication token automatically allowing access to 365 locations such as OneDrive, SharePoint and Teams will be available immediately (providing the Foldr admin has configured these locations in the backend Foldr Settings admin portal).
Users do NOT need to manually link accounts or use service accounts to access 365 storage / files when using Entra ID authentication.
Note that service accounts may still be used to facilitate access to some 365 storage if required, but generally this isn’t necessary unless the administrator wishes to present storage that isn’t typically accessible to the user in Microsoft 365.
If users have Microsoft 365 MFA enabled on their accounts, this will be automatically required when signing into Foldr.
Requirements
Externally accessible Foldr server running v4.24.0.32 or later with a valid SSL certificate
The Azure (Entra ID) Tenant ID – to create an Entra ID licence key for Foldr
App Registration created in Azure (see below)
Limitations of Entra ID Authentication
Microsoft Entra ID authentication is most suited to organisations who primarily use Office 365 for their authentication provider and storage (OneDrive, SharePoint and Teams) and no longer have a traditional on-premise Active Directory.
– Password features in Foldr (password change, delegated and self-service reset) will not work with Entra ID authentication.
– Kerberos SSO is not available when using Entra ID authentication
– SMB shares may still be accessed by users where Entra ID auth is being used, however this can only be implemented using service accounts on each SMB share (along with the ‘Use Service account for all access’. As a result users will access SMB shares with the permissions on the service account.
Organisations that have on-premise Active Directory and require users to access on-premise SMB shares (along wtih other locations such as Office 365) should use a standard licence key and integrate Office 365 in the normal way using either:
Manual linking (recommended for OneDrive, SharesPoint and Teams)
Automated linking (recommended where only OneDrive is being accessed via Foldr)
The administrator can still provide SSO with Azure to provide the same login UI experience to users with a standard (non Azure AD auth setup)
Configuration steps in the Azure Portal
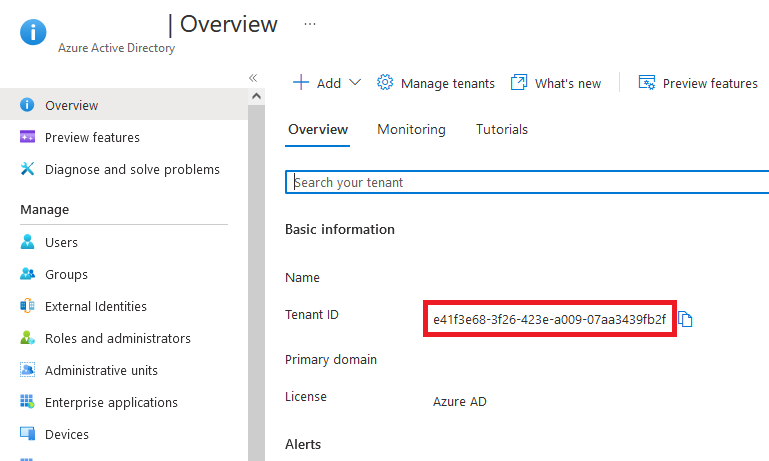
1. Log into the Azure portal at https://portal.azure.com using a suitable administrative account
2. Obtain the Entra ID / Azure Tenant ID for this instance from the Entra ID > Overview panel. Submit the Tenant ID to Foldr support. This is required to create the Foldr server licence key to enable Azure AD authentication.
3. Create an App Registration for Foldr, by clicking Azure Active Directory > App Registrations > + New Registration
In the New Registration screen, give the app a suitable name, leave the supported account types as default (Accounts in this organizational directory only) and configure a Redirect URI using the platform type ‘Web‘ with a Redirect URI configured as follows:
https://address-of-foldr/services/microsoft/connect
Replacing address-of-foldr with the public FQDN of Foldr.
Finally, confirm by clicking Register.
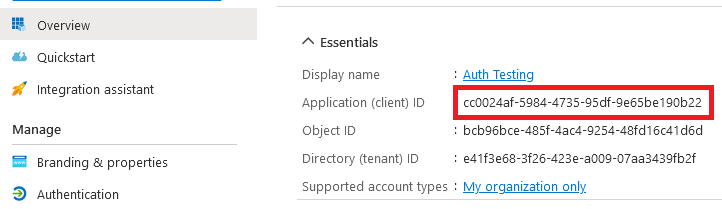
4. The Overview panel will be displayed. From this, take a note of the ‘Application (client) ID‘ – this will be required later.
5. From the Overview panel, click the Redirect URI link
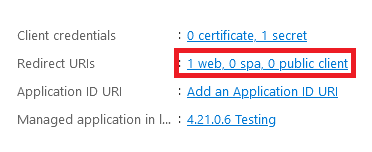
Add a second Redirect URI for:
https://address-of-foldr/services/microsoft/signin
Replacing address-of-foldr with the public FQDN of Foldr.
6. Click Manage > Certificates & secrets from the left-hand panel > + New Secret
7. Enter a description, select a suitable expiration lifetime, and finally click ADD.
The new client secret will be displayed.
IMPORTANT – You should take a copy of the key at this point (the VALUE) as you cannot retrieve it again later, however new keys can be generated later, if required. Be careful to copy the VALUE and not the ‘Secret ID’ as this will not work.
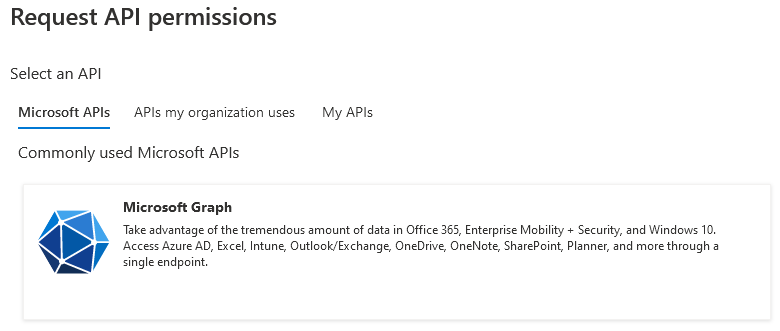
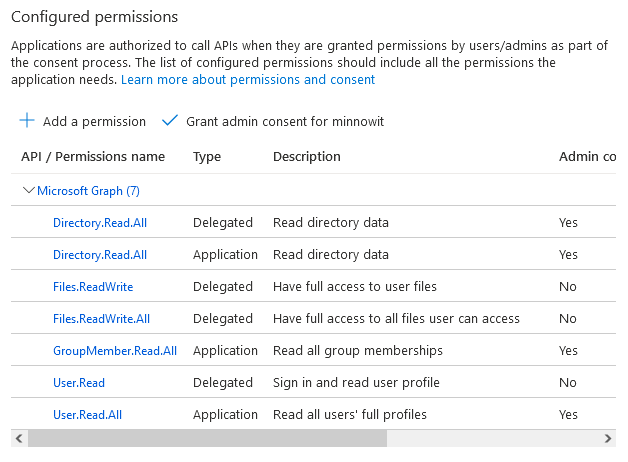
8. Click API Permissions > Add a permission
9. Select Microsoft Graph
10. Click Delegated Permissions
Select the following Delegated permissions from the Directory, Files and User sections:
Directory.Read.All
Files.ReadWrite
Files.ReadWrite.All
User.Read
Click the Application Permissions box at the top of the Permissions selection panel (or go back to the App Registration overview and use API Permissions > Add a permission > Microsoft Graph > Application Permissions)
Select the following Application permissions from the Directory, GroupMember and User sections:
Directory.Read.All
GroupMember.Read.All
User.Read.All
Once the Permissions have been selected. Click Add Permissions to confirm.
11. The permission summary will now be shown showing the updated delegated and application permissions.
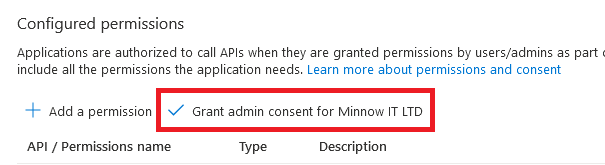
12. Click the GRANT ADMIN CONSENT for <organisation> button.
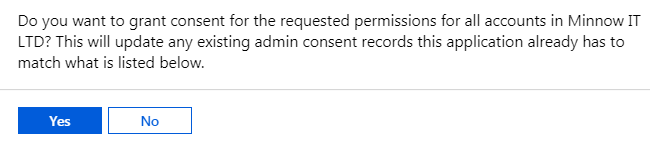
Click Yes on the confirmation prompt.
13. A success message will then be shown
![]()
Enabling Entra ID in Foldr
Ensure the Licence key has been applied to the system (Appliance > Status > General > Licence) before proceeding.
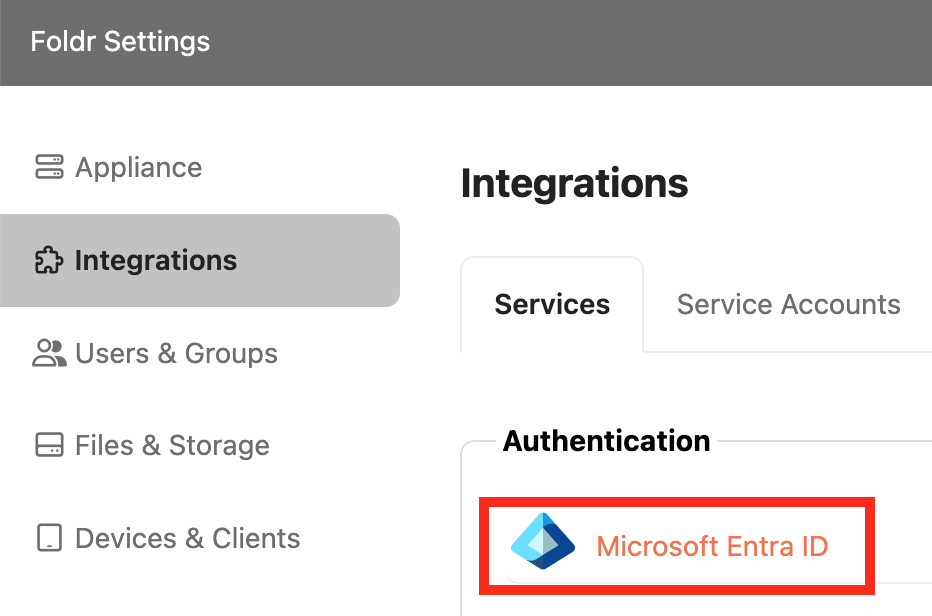
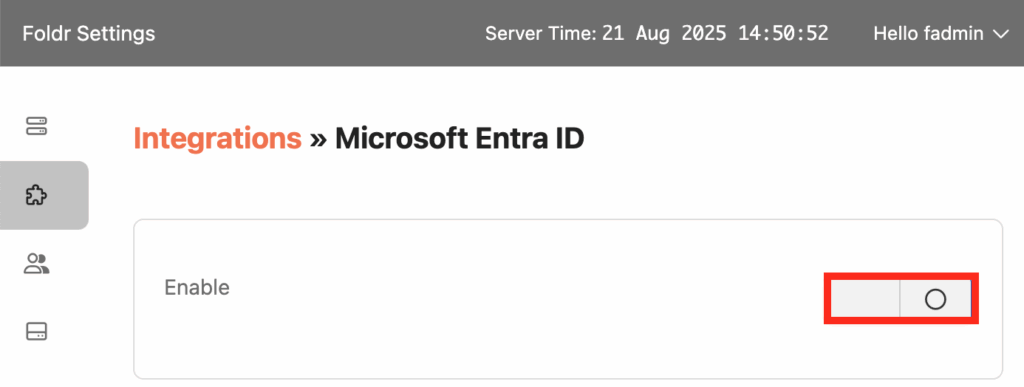
1. Click the Integrations tab and select Microsoft Entra ID under the Authentication section
2. Enable the Integration by enabling the toggle
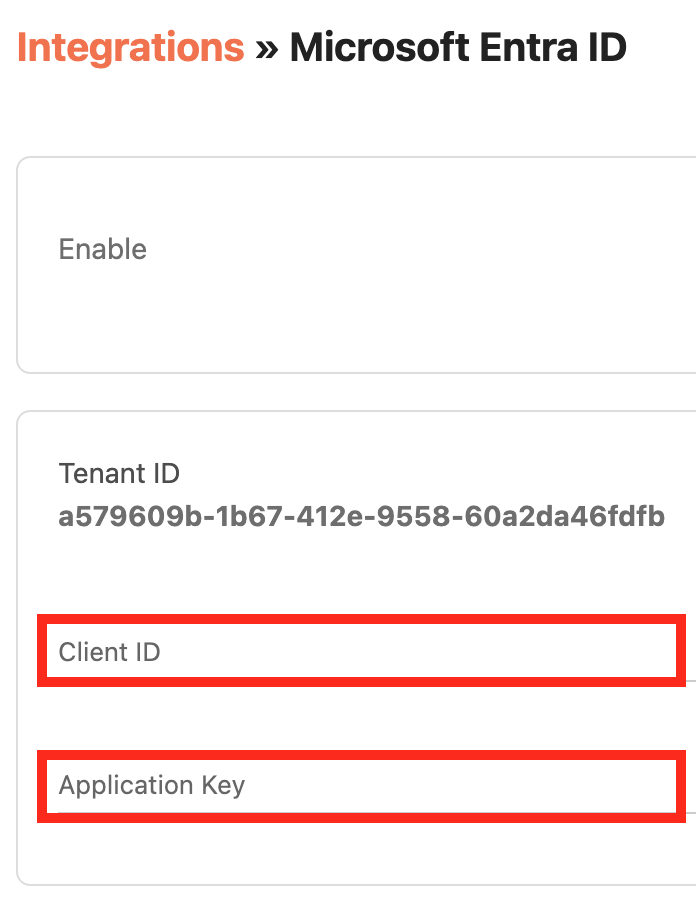
3. Copy and Paste the Client ID and Application Key values created earlier in App Registration in Azure.
Client ID = Application (client) ID in Azure
Application Key = Client secret in Azure
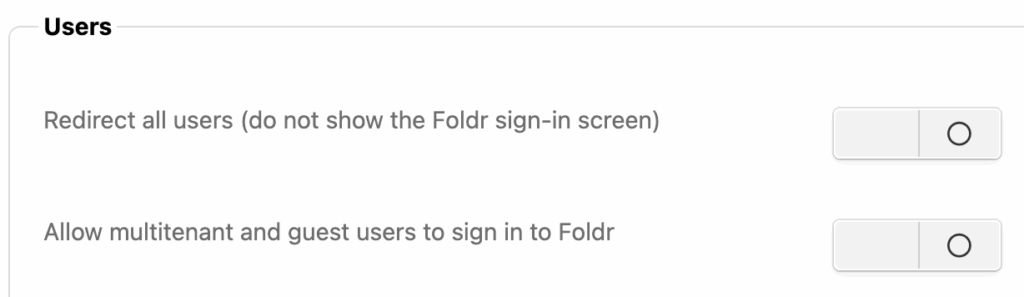
4. Optionally select if all users should be automatically redirected to Microsoft Online to sign in and if users in other configured / trusted tenants are allowed to sign in
5. Click Save Changes
Add the Microsoft 365 Storage Objects (OneDrive, SharePoint or Teams)
1. Add the Microsoft 365 storage locations that you wish to present to users (OneDrive, SharePoint sites and Teams) as required. Navigate to the Files & Storage tab in Foldr Settings.

2. On the Storage tab, click + Add New
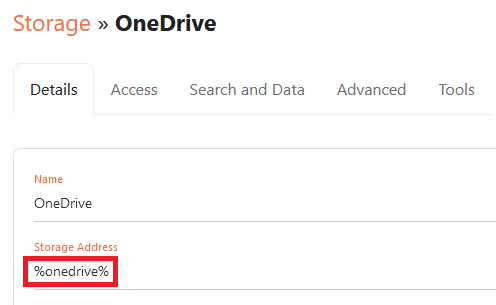
3. Configure a storage item for OneDrive, by giving it a suitable name and using one of the following built-in variables as the Storage Address:
%onedrive% = All files and folders in the user’s OneDrive
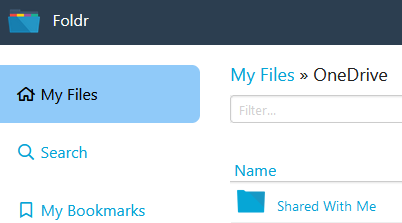
%onedrivewithshared% = Same as above but in addition will include a folder containing items that are shared with the user in Office 365. These are accessed in Foldr using a subfolder in the root of the user’s OneDrive labelled ‘Shared with Me’ as shown below.
%onedriveshared% = Only shared items in Office 365 will be shown in this storage item in Foldr.
4. Create additional storage objects in Foldr Settings > Files & Storage for SharePoint sites as required using the same steps above but using a Storage Address of %sharepoint%(tenant.fqdn/sites/site-name)
A dedicated KB article is available regarding presenting specific SharePoint sites and document libraries
5. Create additional storage objects in Foldr Settings > Files & Storage for Teams as required using the same steps above but using a Storage Address of %teams%
The integration is now complete and users should be able to sign into Foldr using their Microsoft 365 credentials. If MFA is enabled on the account in Microsoft 365, the user will need to pass this to sign into Foldr.
Enabling Search for Office 365 locations
The administrator can quickly enable search for users to search OneDrive, SharePoint or Teams by allowing Foldr to utilise Microsoft’s search API. Please be aware there is also an alternative method to provision search which requires Foldr to index cloud locations. The steps below require no indexing and leverages Microsoft’s own search capabilities in Office 365 to provide search results to users.
Navigate to Files & Storage > Edit Office 365 storage item > Search and Data tab
1. Enable the toggle labeled ‘Show as location for search‘
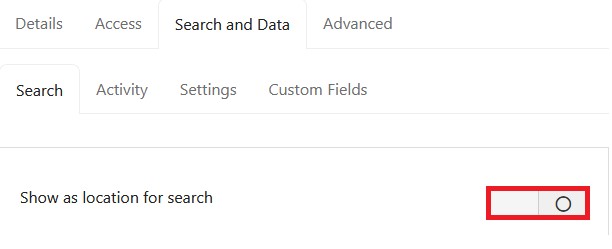
2. Select ‘Use service APIs‘ as the search type/mode

3. Click Save Changes
Search will now be available for the configured storage item in the web, desktop and mobile apps.